Costly Thy Habit As Thy Purse Can Buy
ink, watercolor, and pencil painting process
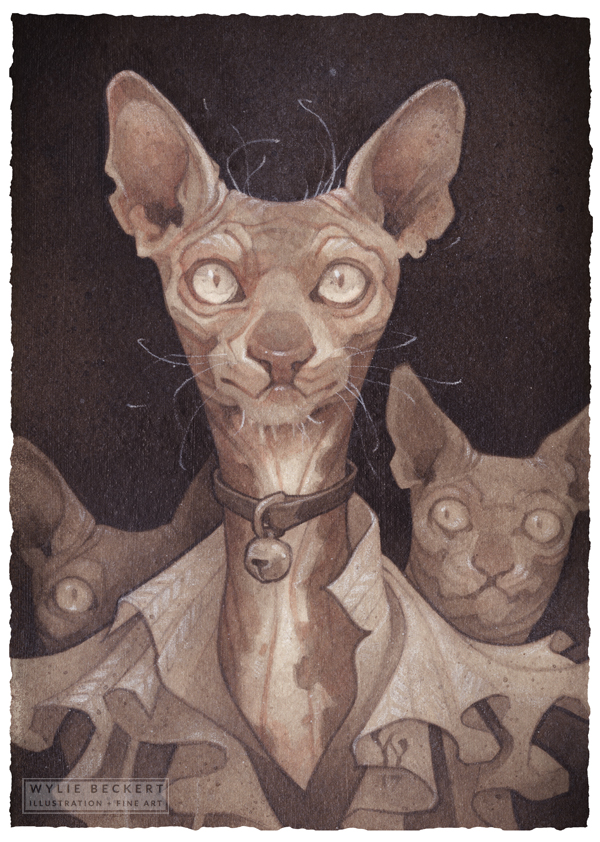
Costly Thy Habit As Thy Purse Can Buy (2017)
5x7" ink, watercolor, and pencil on paper. Original SOLD.
Lately I've been getting bored with my usual oil painting process. While I like the deeper values that a few layers of oil paint give an ink drawing, oils take a few days to dry - just enough time for me to completely lose focus and wander off.
More importantly, paint just hasn't been giving me the look I'm going for in my work; some of the delicacy of the initial drawing is always lost in the translation to paint, and the difficulty of scanning an oil painting always divorces the final image even further from my original vision.
I've been looking for a suitable, more stripped-down replacement for a while. For my latest (and most successful) experiment, I skipped the oil glazing stage altogether, subbing in multiple layers of ink and pencil to create a painting with deeper values and sharper lines.
Pencil Drawing
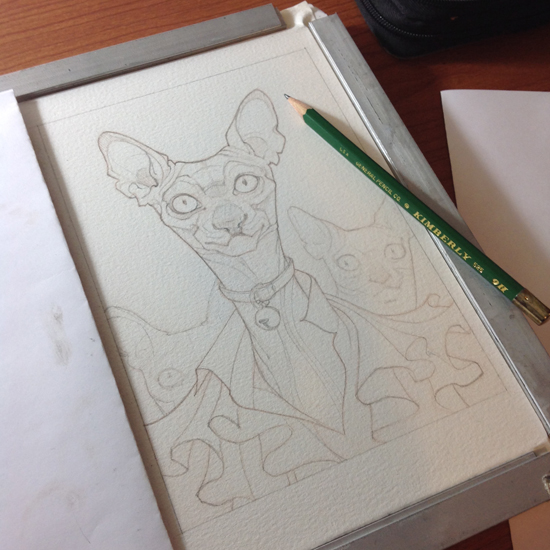
I start with a wet-stretched sheet of Arches watercolor paper (you can find instructions for building a paper stretcher here). The paper has a fairly rough surface, and I've noticed that my usual mechanical pencils end up making a smudgy mess; using a significantly harder pencil (I switch between 9H and 6H) helps the drawing stay put.
Ink Wash
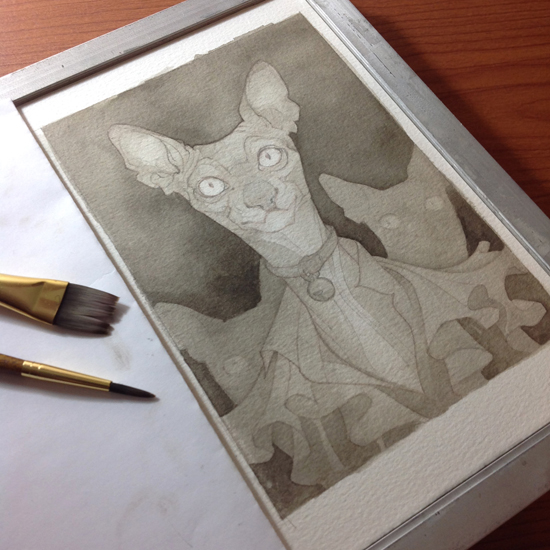
Since this will be a fairly dark painting, I don't want much (if any) white paper showing. I dampen the paper and lay down a light wash of ink (a very diluted 50/50 mix of FW Sepia and Liquitex Carbon Black); while the ink is still wet, I use a paper towel to blot some of the color out of the lightest areas - mostly just the eyes and markings on the main cat's face and chest.
Once it's dry, I start laying in the value structure - a darker background, some patchy markings on the cat, and shadows in the folds of cloth.
Pencils, Revisited
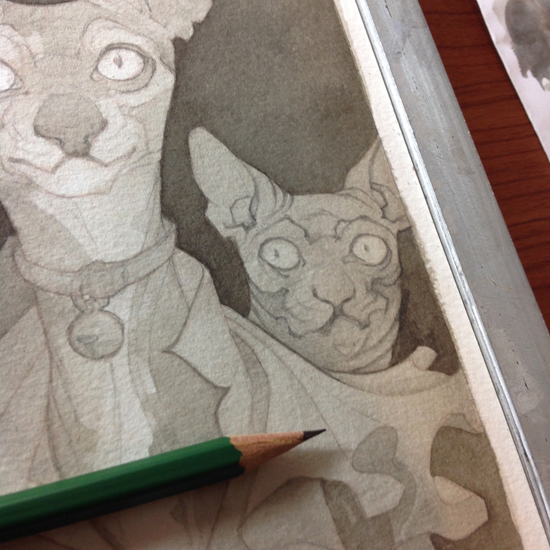
The drawing I started with was fairly light, especially in the background figures; the ink wash pushes it back even further. Once the paper is completely dry, I revisit the pencil drawing with heavier, darker lines. While my initial sketch was somewhat quick and rough, this round I'm aiming for more elegant lines - keeping the edges clean and varying the line thickness for more interest.
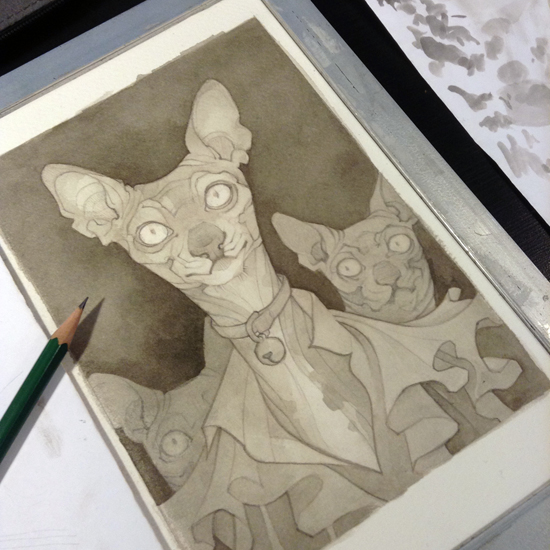
Inks, Revisited
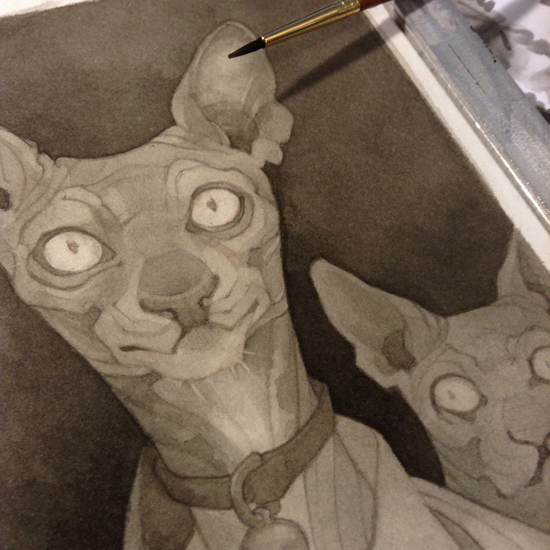
I keep building and layering in stages - when I need darker values, I'll add a light overall ink wash, then paint in darker details with a stronger wash. If the line art needs more emphasis, I switch back to pencils. Pure black areas like the background require quite a few layers, but the shading on the figures comes together surprisingly quickly.
I like that layering a number of thin layers together - rather than attacking the values at full strength - softens the edges of each block of values, and gives a more naturalistic impression of light and shadow.
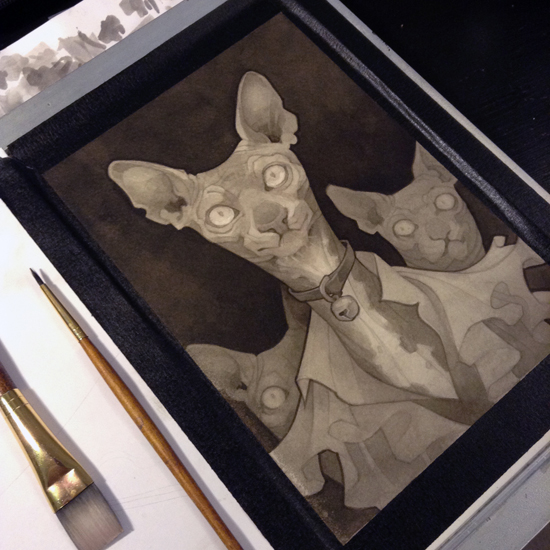
It can be hard to judge whether I'm going dark enough next to the stark white edges of the paper; taping the edges with black masking tape gives me a better point of comparison for the background value (along with helping to contain the heavier ink washes I'll need to get a near-solid black).
Watercolor
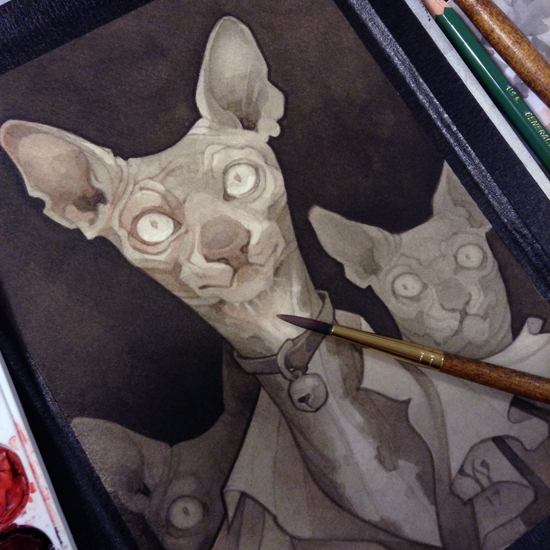
I was originally planning to stick to black and white - but a little bit of super-subtle watercolor adds life to the image, and helps really set the main cat apart from the background.
WHITE CHARCOAL PENCIL
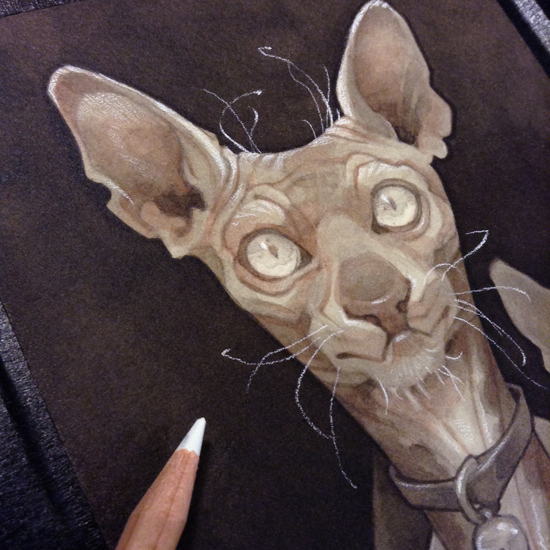
I add fine details with an extremely sharp white charcoal pencil. I know from experience that the white charcoal will fade a little when I seal the piece, so I use a fairly heavy hand, and apply the charcoal more opaquely than I necessarily want it to look in the final image.
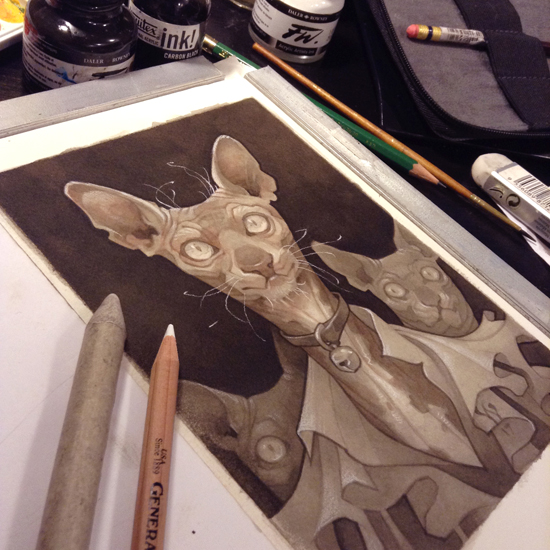
TEXTURE & FINISHING
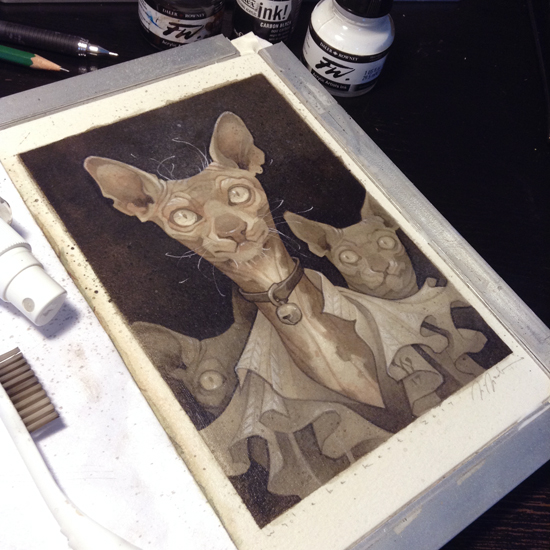
I seal the painting with a few coats of diluted matte medium - mixed 50/50 with water, and applied with a small spray bottle to avoid dissolving the watercolor and white charcoal layers. The final image looks a little too clean and stark - it needs some texture to draw it away from the brink of cartooniness.
Dipping a toothbrush in ink, then drawing the handle of a paintbrush over the bristles creates a mist of fine splatters. I splatter a bit of diluted black ink into the light areas, and (even more strongly diluted) white ink into the dark areas, using bits of torn paper towels to mask off the areas I want to leave untouched in each instance.
For an even softer misting of ink, I use another spray bottle to apply a single spray of very diluted white ink. Because I've thinned the ink so much, this technique dries to a much softer effect than the toothbrush splatters - you can just barely see it in the cloudy white glow of the background between the main cat's ears.
Once dry, I apply a few more spray-on coats of matte medium (I don't really trust the extra-diluted ink to adhere to the paper on its own) followed by a few coats brushed on at full strength to seal the entire painting.
IN CONCLUSION...
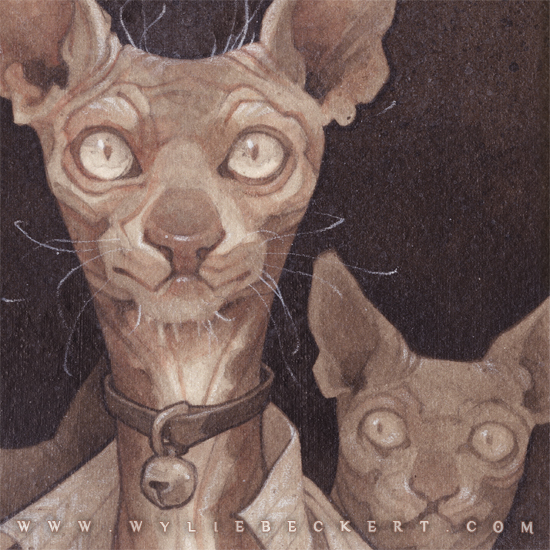
While I still need to do a few more tests, I'm basically in love with this process. It really highlights the drawing that underpins the piece (my favorite part of any painting, and the one I'm best at) while still producing the deep values I was leaning on oil paint to supply.
This is the first technique I've played around with that lets me push the realism a bit further without sacrificing my stylized outlines. The level of rendering I'm able to get with the ink/pencil combo pretty much crushes oils (or at least, oils in my questionably capable hands), even at a small size (this piece is only 5x7")... And OMG IT SCANS! I've never had to do so little post-processing in Photoshop to match the scanned image to the original painting.
You'll definitely be seeing more of this process from me - in fact, I'm planning to tackle my next large-scale project with the same techniques as this piece. If you want to follow along with its creation (and check out more process tutorials) you can support my art on Patreon, link below: